Case History: CH-06
Unnecessary Panic
-
Preface
Our ultrasonic investigation at a large financial institution identifies weakness at their smallest diameter threaded fittings at the condenser water system. Multiple drains and vents have been installed using standard schedule 40 pipe directly connected to brass ball valves. All other results are excellent, and show the larger main pipe to be in near new condition.
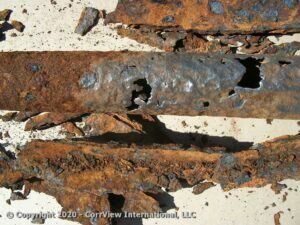
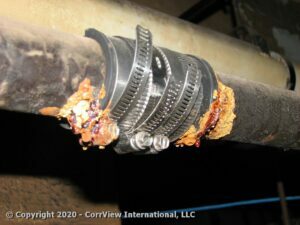
Corrosion activity is low, but after 20 years of service, has reduced the small threaded nipples to near or below minimum acceptable standards. Higher corrosion and pitting is measured at the brass valve side of the small 3/4 in. steel nipples due to suspected galvanic activity, with leakage and rust encrustation at the threads common to many examples.
Testing near the valve side of many pipe nipples produces low thickness values approaching the thread cut itself. We recommend the global identification and replacement of every existing threaded pipe nipple prior to a reliable isolation valve, and recommend the use of dielectric fittings or schedule 80 pipe as their replacement.
 While most such fittings are at the pumps and before larger service valves where they can be isolated from the main system, there are approximately 8 threaded fittings located prior to any possible isolation. Some are on 18 in. and 24 in. piping. Freezing various lines is considered but is not feasible. We therefore make the recommendation to encapsulate this vulnerable pipe by welding over it a 3 in. or 4 in. extension of capped schedule 40 pipe. With the valve handle removed, this simple precaution will prevent service problems when the threaded nipple eventually fails.
Within a year, the facility hires a mechanical contractor to perform the work, and all problem areas which can be isolated are easily corrected. Prior to encapsulating the 3/4 in. pipe nipples located on active lines, the contractor brings in their own ultrasonic testing firm to certify that the pipe as suitable for welding.
The firm identifies severely low wall thickness in the areas where welding is planned, and cautions against welding to the pipe. Facility engineers and managers are informed by the ultrasonic technician that the 10 in. to 24 in. condenser water piping is extremely thin, and might fail at any moment. Further ultrasonic testing outside the 8 original areas of interest are requested by the facility whereby even worse results are stated. The ultrasonic testing firm marks its wall thickness measurements directly onto the pipe using a Sharpie marker, writes on the pipe a test location number, and hand writes on paper their wall thickness measurements for their report.
In certain areas of the 24 in. piping headers to the refrigeration machines, the contractor’s ultrasonic inspector finds such low wall thickness (to below 0.030 in.) that he expresses major concern at even writing his thickness measurements on the pipe using a felt marker. Indicating to the facility managers and engineering staff that the pipe may fail should he even gently write on it, he instead requests a tube of pump bearing grease and gently marks circles and thickness measurements onto the pipe using his finger dipped in grease.
These results throw this critical facility into massive panic, and raise concern that the entire refrigeration plant and all 24 in. condenser water pipe will require replacement. The facility considers immediately contracting an emergency refrigeration or cooling tower plant for the site given warning by the ultrasonic inspector that just bumping into the pipe or even writing lightly onto its surface could cause the pipe to collapse.
While such preparations are considered, the facility contacts CorrView International, LLC requesting an immediate site visit.
-
Investigation
Initial phone discussion with facility management more then defines the level of panic and fear which exists. Based upon what they have been informed, management and engineering are concerned that touching our thickness probe to the pipe might itself produce a failure, and inquires to whether any adjustments can be made to our field testing procedure to minimize this threat. Management requests of CorrView International an immediate answer to the question of pipe condition given that they need to make a decision regarding the emergency cooling towers by the end of the day.
We assure everyone that there is no threat to this piping whatsoever, and that the results indicated to them previously are totally in error. We point out the results of our prior ultrasonic examination of the entire condenser water system only 1 year earlier, and where our thorough investigation of 65 examples of condenser water pipe found consistently high and uniform wall thickness measurements still at or near new ASTM specifications. This after 20 years of service. We express no doubt whatsoever that the measurements related to them by their mechanical contractor and his ultrasonic technician are completely wrong.
Ultrasonic testing is performed by CorrView International at each of the 8 areas of pipe planned for encapsulation where we identify high and uniform wall thickness approaching new standard pipe specifications. We find no indication of any pitting and no thickness values anywhere approaching the low 0.075 in. measurements reported by the mechanical contractor’s ultrasonic testing firm. Measurements are consistently at near 0.365 in. and far above the limit for safe welding.
We also re-test the threaded pipe nipples themselves to show a continued loss of wall thickness from our prior investigation – thereby reaffirming the need to perform the encapsulation of the pipe as soon as possible.
Testing is then performed at other areas of the 24 in. condenser water mains where the mechanical contractor’s ultrasonic testing firm had identified wall thickness so low that they had advised against writing on the pipe with even a felt marker. In each and every example, CorrView International identifies the pipe wall in near new condition, and at virtually the same wall thickness as we had documented previously.
The facility provides us a copy of the one page spreadsheet style report by the mechanical contractor’s ultrasonic testing firm, which proves to be worthless. Reviewing it together with building engineers, we can find no correlation between the measurements written or marked on the pipe with the measurements reported for that location in their spreadsheet report. Our best guess is that their incorrectly taken wall thickness measurements were then randomly mixed together and incorrectly reported for the various piping locations tested.
We explain to our client that they have in effect all erroneous wall thickness measurements which have been inaccurately recorded and mismatched to the wrong test locations to produce a completely worthless report.
The mechanical contractor is called to the facility and presented our findings, but maintains that the pipe is unsafe to weld. In anticipation to such a conflict, we have brought to the facility two different models (37DL and 38 DL) of Panametrics instruments, multiple probes, and different calibration blocks. The set-up and calibration of both instruments is very well demonstrated to the mechanical contractor and all site personnel involved. Testing is performed within the circles drawn on the pipe by either Sharpie or greased finger, where none of the low thickness measurements inscribed are found. We allow building engineers to scan the pipe themselves to see our results first-hand.
We demonstrate our procedure over and over at similar examples, and explain that there is not the slightest possibility that 24 in. steel pipe could even survive under its own weight at the 0.045 in. low thickness values identified in some areas by the contractor’s ultrasonic inspector. We are requested to double check all of the areas tested by the contractor’s ultrasonic inspector where we find none of his measurements accurate or even close to accurate.
We question the contractor to the equipment used by the other ultrasonic inspector and are told it is “highly advanced,” but also determine that it has no visual waveform display and is a relatively small device. In reality it seems to be a low cost unit not capable of displaying the signal path through the material, nor verifying a wall thickness signal, nor capable of echo-to-echo measurement necessary for painted pipe, and not capable of data logging the thickness results. The type of probe used is unknown, but is not likely a higher frequency unit suited for such applications.
For areas of painted pipe, we can speculate that the ultrasonic instrument used by the mechanical contractor’s ultrasonic firm returned a false signal reflection at the boundary between the paint thickness and the steel pipe. Without a waveform display, and possibly lacking the experience to interpret such low thickness results due to this error, only the thickness of the paint was displayed. Since paint is softer, less dense, and transmits sound at a much slower velocity than steel, the movement of the ultrasonic signal back and forth through the paint would be inaccurately interpreted by the instrument as having traveled through a greater distance to produce the thickness values reported.

For illustration at left, a far too high gain level has reduced the backwall reflection echo; producing a falsely low wall thickness measurement of 0.053 in. while the true wall thickness of this new section of 6 in. ASTM pipe having a specified wall thickness of 0.280 in. pipe is actually 0.265 in. Without a waveform showing this obvious error to the UT operator there is no other indication of whether the 0.053 in. measurement is right or wrong. Poorly bonded paint will produce the same event, with the signal only penetrating the paint before reflecting back.
While no waveform display on the contractor’s equipment prompting this chaos was a major factor, experience should have made it obvious that a wall thickness of 0.030 in. simply could not exist for hundreds of feet of 24 in. condenser water pipe without having experienced massive leaks and piping failures. To state the pipe could not be safely written upon using a felt tipped marker, to understate the stupidity involved, was utterly absurd.
Further errors in wall thickness measurement performed at areas of bare steel cannot be explained, and are simply due to operator and/ instrument error.
Our inspection of the painted pipe used echo-to-echo technology to negate the paint thickness entirely. As a final check and demonstration. we remove the paint in those lowest thickness areas circled and perform standard thickness testing, which identified the same thickness values identified by echo-to-echo measurement.
-
Conclusion
The building engineers and facility management are finally convinced to the accuracy of our results and reassured that no threat exists for performing the threaded pipe encapsulation – still in contradiction to the contractor who stands by the results of his UT provider. The work is performed within a few days of our inspection with no issues.
© Copyright 2023 – William P. Duncan, CorrView International, LLC


